

This post contains a few affiliate links which means a portion of the proceeds go to me, at no extra cost to you. Thank you for supporting Lion’s Bread and this hustling Mama.
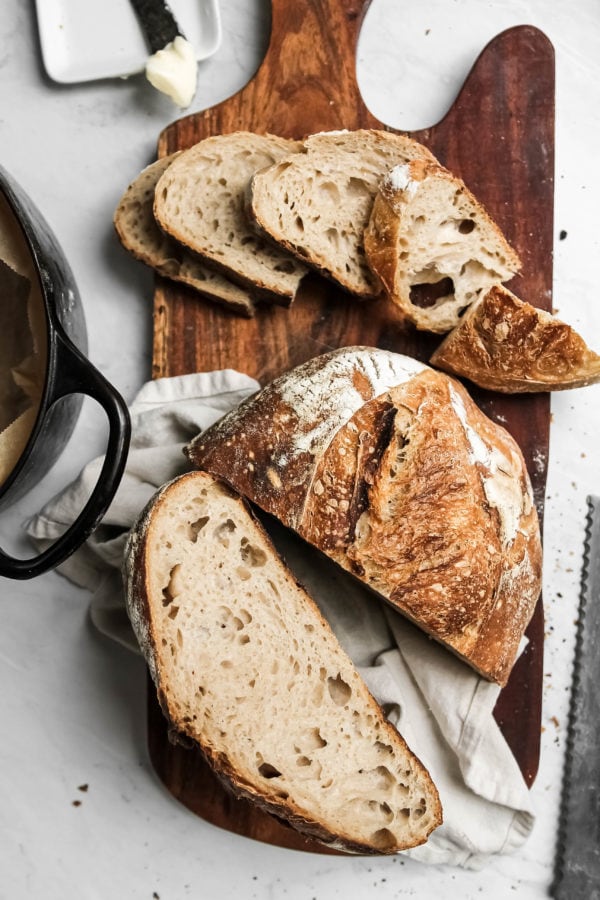
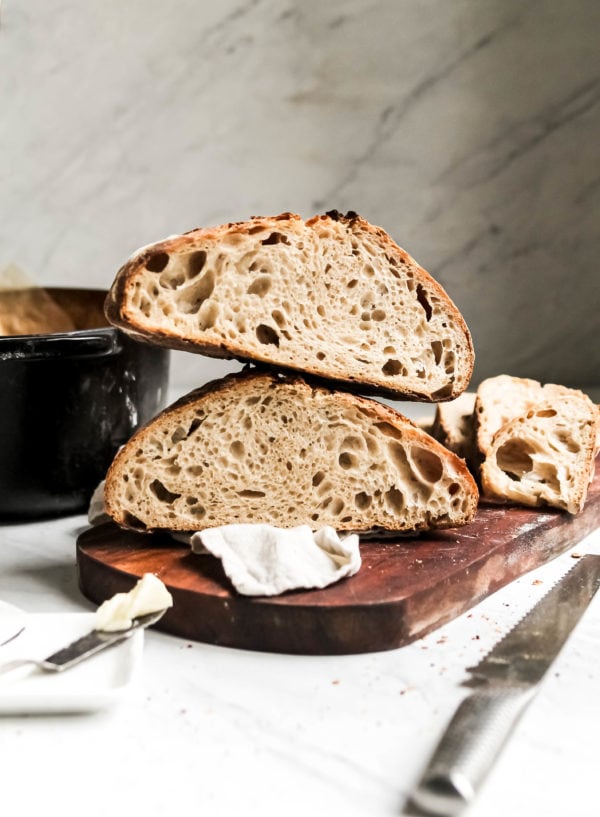
a beautiful airy loaf of rustic sourdough, entirely homemade, 100% naturally leavened with sourdough cultures
Ok friends, we’re going to jump right in. If you’re usually a “Jump to Recipe” type person, I urge to actually read the post because there are lots of useful tips that will help you bake a better loaf of bread. To say that I’ve been working on this post for a while is a massive understatement. In fact, I’ve put it off because it’s a bit more involved than most of the other bread recipes on the blog, like Everyday Artisan Bread, and Same-Day Country Loaf.
Here’s the thing with baking 100% Sourdough Bread at home: it’s not difficult, it just takes time. Full disclosure, you may have to make this a couple of times before you really get a feel for it, and that’s totally ok. Every great bread baker has made countless loaves, and over time you really do get a FEEL for it. Slicing into a beautifully proofed, airy loaf of bread is highly satisfying and exhilarating, and totally worth the effort.
The back bone of homemade sourdough bread, is of course, the sourdough “starter”. A starter is a mix of flour and water that has been fermented over time, and contains a natural colony of yeast that leavens dough (makes it rise). In this post, we’re not discussing how to make your own starter, because we covered that THOROUGHLY on my Instagram Stories. If you haven’t yet, watch my stories for the FULL tutorial on How to Make a Sourdough Starter.
How to make Homemade Sourdough Bread
STEP 1. Start with a refreshed starter, that you’ve fed about 8 hours prior. The starter should be peak bubbly and foamy. You’ll mix a small amount of the starter with whole wheat flour and water to create a “levain”. A levain will be the ONLY leavener in your bread, and it’s a chilled out version of your very pungent starter. You’ll let the levain sit for 6-8 hours.
STEP 2. Mix the dough. You’re going to dissolve the levain in warm water. Then, add the unbleached AP flour, and mix by hand, pinching the dough to incorporate the water and flour. I use a kitchen scale to measure out my ingredients by weight. This is much more precise, so get yourself a scale if you don’t have one already. Let this mixture rest for 20 minutes. Then add the salt, and mix by hand again, pinching the dough as you go.
STEP 3. Stretch and fold and the dough, every 45 minutes for 3-4 hours. This is a gentle process that replaces kneading. We’re building up the strength and structure of the gluten without deflated the dough. Gently lift up sides of the dough, and fold onto itself, until you work your way all the way around the dough. Dampen your hands with water slightly to prevent sticking. This is the dough’s 1st rise, called ‘bulk fermentation.”
STEP 4. Shape the dough. Gently turn the dough out onto a flour work surface. Pull the corners in to create a loose round shape. Let the pre-shapen dough rest for 15 minutes. Then pull the edges up an over and pinch them together, and roll the dough up to create a tighter ball. Place the dough ball seam-side up in a prepared 8″ round or oblong proofing basket/bread form.
Cover the dough loosely with a tea-towel, and place in a plastic bag, closed with a bag-clip. Refrigerate the dough for 8-12 hours.
STEP 5: Bake bread! Remove the proofed dough from the fridge. Place a dutch oven on the middle rack of your oven. Preheat the oven to 450 degrees F. Cut a piece of parchment to fit in the bottom of the Dutch oven. Turn the dough out onto the parchment. Slash the top using a sharp knife or razor, to allow the steam to escape. Use oven mitts to carefully remove the hot Dutch oven from the oven. Place the loaf (with the parchment paper) into the pot. Place the lid on top. Bake for 25 minutes. Use a spatula to take the loaf out of the pot, and set it back in the oven to bake for another 18-20 minutes. This prevents the bottom crust from burning before the bread has finished baking.
Allow to cool completely, before slicing into the bread. I know this is hard (bc hello, freshly baked bread) but the bread actually continues to cook, while it cools, and slicing into it too early results in a gummy crumb (crumb is the inside of the bread).
The Equipment I Use
8″ round or 10″ oval proofing basket
I like to mix my dough in a glass bowl or a plastic Cambro tub with a lid. Try not to use a metal bowl, because metal is reactive, and could change the results.
Sourdough Bread Baking Timeline
I know what you’re thinking, “when am I ever going to have time to make this?!” The answer is simple. If you’re going to work 9-5 during the week, this is a weekend project. Here’s a sample baking schedule:
Friday night:
9pm: Feed your starter.
Saturday:
9am: Prepare the leaven.
5pm: Mix the dough, stretching and folding ever 45 minutes.
9pm: Shape the dough. Place the dough in proofing basket, refrigerate overnight.
Sunday:
8am: Preheat oven (with Dutch oven inside.)
9am: Remove the loaf from the fridge, turn it out onto parchment paper, slash the top and Bake bread!
Ok friends, I’m here for all your questions and comments. Get out there and bake beautiful bread! xo- L
Want to save this recipe for later? Just click on any picture, and tap the “Pin It” button to save it to your favorite Pinterest Board!
Love this recipe? Be sure to check out: Everyday Artisan Bread, Same-Day Country Loaf, and Lion’s Bread Original Challah
Homemade Sourdough Bread
Ingredients
levain
- 20 g active refreshed starter, (fed)
- 30 g whole wheat flour
- 30 g water, at room temperature (75 degress F)
Dough
- 80 g leaven
- 320 g water, at room temperature
- 330 g unbleached all purpose flour
- 80 g whole wheat flour
- 11 g kosher salt (I use Morton's)
Instructions
Prepare the leaven: Place the refreshed starter and water in a large glass bowl or Cambro tub. Stir to break up the starter. Add the whole wheat flour and mix with a spoon until no dry lumps remain. Cover with plastic wrap, and allow to ferment at room temperature for 8 to 12 hours.
Mix the dough: When bubbles break the surface of the leaven, it smells a bit sour, and it has swelled considerably in size, add the water and stir to combine. Add the AP flour and additional whole wheat flour to the bowl. Use your hands to mix, pinch and squeeze the dough in a circular motion until no dry lumps remain. Cover the bowl and let the dough rest for 15 minutes. This allows the flour to fully hydrate before adding the salt. Sprinkle the salt evenly over the surface of the dough and mix well to combine. The dough should feel somewhat sticky at this point.
Bulk fermentation: Set the bowl aside in a warm place (about 75°F) to bulk ferment for about 3 1/2 to 4 hours, depending on the temperature of the room. This could be 30 minutes shorter in the summer, or 30 minutes longer in the winter. Now you stretch andfold the dough in the bowl, in order to help develop the gluten and strengthen the dough to trap the fermented gases, creating beautiful air pockets in your loaf. Dampen your hands with water to prevent the dough from sticking and gently lift up one corner of the dough, and fold it to the center. You shouldn't be stretching so high that the dough tears. Rotate the bowl and repeat 3 to 4 more times until you have worked your way around the dough. Repeat this process every 35 minutes for 3.5 to 4 hours. Be extra gentle towards the end , so you don't deflate the dough.
Shape the dough: The dough should be puffy, bubbly, and have increased by at least 1/3 after 3.5 to 4 hours. There are 2 stages to shape the dough: pre-shape with a short resting period, and a tighter final shaping. Using a bowl scraper, gently remove the dough from the bowl and place on a lightly floured surface. Using your hands, bring the top of the dough to the center, then bring the bottom to the center, and then the two sides in. Tuck the resulting four corners to the middle as well, resulting in a slightly rounded form. Using your bench scraper, release the dough from the surface and flip it over seam side down. Cover the dough ball with plastic and allow to rest on your work surface for 15 minutes until it relaxes.
Final shape: use your bench scraper to flip the dough over onto a lightly floured surface, seam side up. Starting from the top, tuck the right side to the center, holding it in place while you bring the left side to the center overlapping with the first. Repeat this side-to-side stitching until you reach the bottom of the dough. Roll the bottom toward the center, tucking as you go to create tension, until the seam side is down. Flour the top of the loaf generously. Use your bench scraper to pick up the dough and flip it over, seam side up. Gently place it into your proofing basket. Cover the dough loosely with a cloth, then place the whole basket in a plastic bag, sealed with a clip. Place in the refrigerator to proof for 8 hours to 12 hours before baking.
Place a large Dutch oven on the center rack of your oven, then preheat your oven to 450 degrees F.
Remove your loaf from the refrigerator. Cut a piece of parchment paper to fit the Dutch oven and carefully flip your loaf onto the parchment seam side down. Score the top of the loaf with a razor blade about 1/4-inch deep to allow steam to release and the loaf to fully expand while baking. Use oven mitts to carefully remove the Dutch oven from the oven. Place the scored loaf, along with the parchment paper into the pot. Cover, and bake with the lid on for 20 minutes. Remove the loaf from the pot, and place back in the oven, on the center rack. This prevents the bottom crust from burning. Bake for another 15 to 20 minutes until the crust is a deep, mahogany color. Cool completely on a rack before slicing.
Recipe Notes
This recipe can easily be doubled to make 2 loaves. After the bulk fermentation, you will divide the dough in half, and shape 2 loaves, and place in 2 separate baskets. If you only have 1 Dutch oven, remove 1 loaf from the fridge first. While the 1st load is baking, remove the second loaf and allow it to come to room temperature.
The post Homemade Sourdough Bread first appeared on Lion’s Bread Blog.