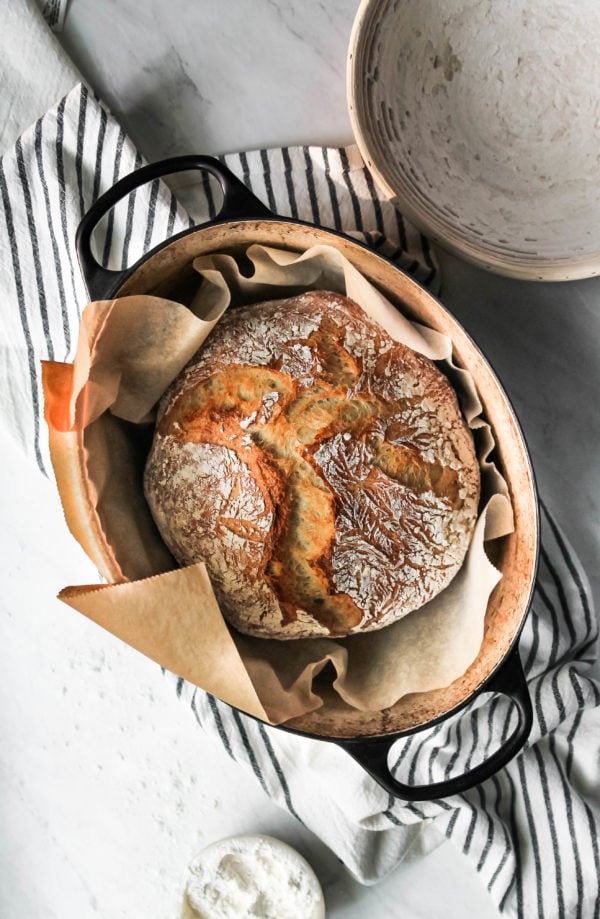
a highly bake-able rustic country style loaf that can be mixed in the morning, and baked in time for dinner!
Hi everyone! As you know, one of my main goals this year was to bring you more bread recipes, that are achievable for home bakers. A great loaf of bread is in your reach, seriously! I know it can be intimidating working with yeast, and shaping the dough. In this post I’m going to give you a real step-by-step tutorial. I’ll hold your hand through the whole process. And really, it’s super simple, only four (4!) ingredients, and very minimal hands-on work.
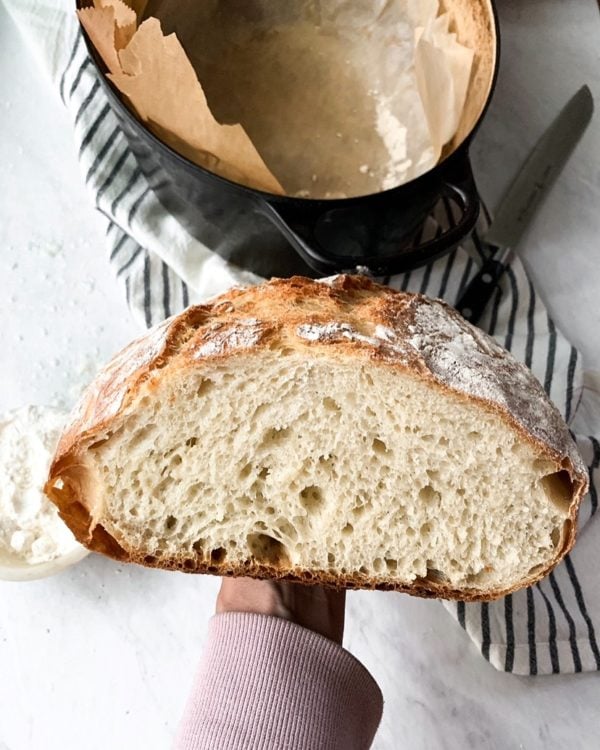
I absolutely LOVE this loaf of bread because it is a huge crowd pleaser. Everyone falls in love with the crisp, thinner crust, and pillow-y, chewy interior crumb. It is amazing sliced for sandwiches and toasts, or larger slabs for garlic bread and alongside hearty soups.
Why should I make bread at home?
The first thing to know when you’re making bread is the WHY. Why go through the effort of making homemade bread? Isn’t is SO much easier to pick up whatever loaf is at the store for $4? Yes, it is easier. Is it better for you? Hard NO. I’ve said this before, but I’ll repeat myself: Real bread should have very minimal ingredients, and they should all be ingredients that you can pronounce. A big part of the overwhelming amount of people that have gluten intolerances is simply because they’re putting chemicals into their bodies, hidden in loaves of bread. Even most bleached all-purpose flour is made from wheat that is treated with Round-Up. Pure poison. I am willing to spend an extra dollar or two on Unbleached organic all purpose flour that I know comes from a good source, and is made ethically.
How to make an artisan Country Loaf
This Same-Day Country Loaf is mixed up within 45 minutes in the morning, then left to rise for about 6 hours. Then, you shape the dough into round boules, and let them rest for another 45 minutes to an hour while the oven is heating up. The bake takes another 50 minutes. This recipe doesn’t require any fancy machinery. In fact, all of the mixing is done by hand! It’s a really sensory experience, and once you make this bread, you’ll understand why bakers really develop a ‘feel’ for their breads.
The Equipment I use
To mix the dough, I use a large airtight 6-quart tub made by Cambro for this bread. You could absolutely use a very large bowl covered tightly with plastic wrap.
After forming the dough into round boules, I let them “proof” for a second, quicker, rise in 10-inch woven proofing baskets that are called brotforms (bread forms in German). I bought mine on Amazon. I really love the shape and structure that these baskets give my bread, but if you’re not ready to invest just yet, you can simply form the loaf, then place it on a piece of parchment paper. Then cover the loaf with a piece of plastic wrap sprayed with nonstick cooking spray.
The last key element to a great loaf is a heavy weight Dutch oven type pot. These are usually cast-iron, coated in enamel. You will bake the bread with the lid on the Dutch oven, which traps the steam inside, keeping the crust soft until the loaf rises and expands to max potential. Half way through the bake, you’ll remove the lid and let the loaf continue to brown. Le Creuset and Staub are known for making excellent quality Dutch ovens. However, there are more affordable versions that work really well like this one from Lodge.
I’m not playing it cool at all. I really, really want you guys to make this! I know you will love it, and just maybe get addicted to making homemade bread, like I am! This process is seriously one of the most satisfying ways you can spend time in the kitchen. If you have ANY questions at all, please comment below, or shoot me an email at lionsbreadblog@gmail.com .
You know I love seeing my recipes come to life in your kitchens, so if you make this Same-Day Country Loaf, take a pic and tag me @lions.bread #lionsbread on Instagram so I can see it!
Yeast and Love, LeAnne
Same-Day Country Loaf
a highly bake-able rustic country style loaf that can be mixed in the morning, and baked in time for dinner
Ingredients
- 500 g unbleached all purpose flour (I like King Arthur) about 4 ¼ cups
- 360 g water, warm (about 90-95 degrees) 1 ½ cups
- 4 g dry active yeast 1 tsp
- 11 g kosher salt (I like Morton's) 2 tsp
Instructions
Autolyse phase: Combine the 500 g of unbleached AP flour with the 360 g of warm water in a large bowl, or plastic Cambro tub. Use your hands to mix until combined. Cover tightly, and let rest for 15 minutes.
Sprinkle the salt and 1 teaspoon of yeast over the dough. Dampen one hand with water, and incorporate the salt and yeast by hand. Use a pinching, and squishing motion to make sure the yeast and salt are fully incorporated. Fold the dough over itself a few times, cover at let rest for 20 minutes.
Stretch and fold: This Country Loaf needs 2 folds. With a damp hand, gently lift up the side of the dough, stretching but not tearing, and fold it over to the center of the dough. Repeat until you make around the whole mass of dough. Cover for 20 minutes and repeat.
Allow the dough to rise for about 5-6 hours (depending on your room temperature, colder rooms take longer, warmer rooms will be about 30 minutes shorter) until the dough has at least doubled in volume. If you're working with a clear cambro type tub, the dough should look very bubbly and airy on the sides.
Dust a proofing basket generously with flour, set aside. Generously flour your work surface. Using a rubber spatula or bench scraper, ease the dough out onto your work surface. Flour your hands. Pull all four corners of the dough to the center of dough ball, in a north, south, east, west motion. Flip the ball over, and gently pull and drag the dough towards you, creating slight tension and a nice round shape. Flour the top of the dough ball, pick it up, and place it seam-side DOWN into the prepared proofing basket. Cover with a clean kitchen towel, and let proof (rise) for 1 hour.
Meanwhile. Place a Dutch oven on the center rack of the oven. Preheat to 450 degrees F. Cut a piece of parchment paper to fit in the bottom of the Dutch oven.
After an hour, using heavy duty oven mitts, remove the very hot pot from the oven and place on the stove top. Remove the lid. Invert the dough out onto the parchment paper, the seam side should now be up. Carefully place the dough into the Dutch oven (including the parchment paper), cover with the lid, and bake for 25 minutes. Remove the lid, and continue baking for another 20 minutes. Allow the bread to cool on a wire rack before slicing into it. This is important to allow the interior to finish cooking, so you don't get a gummy crumb (interior).
Store the bread at room temperature for up to 3 days. Or slice, and freeze. To reheat, just pop a slice straight into the toaster.
Recipe Notes
*If you notice the bottom of the crust getting too dark, and almost burnt, you can remove the loaf from the Dutch oven after the initial 25 minutes, and place back in the oven, directly on the oven rack to bake for the remaining 20-25 minutes.
**PRO-TIP: save the ends of the bread, let them dry out, and pulse them into breadcrumbs in the food processor. Store in an airtight bag in the freezer.
Linda says
Made the bread yesterday, I think it could’ve been lighter in texture . Perhaps add more water? How wet should the dough be after adding the water?
LeAnne says
Hi Linda! You may need to add a bit LESS water, depending on your room temperature and humidity. Usually if the dough feels too sticky or wet, you can just add a bit more flour. Hope this helps!